Revision 1.3


This tutorial will teach you how to setup and install Psy-Q for the PlayStation 1 (PSX, PS1 / PSone).
What is Psy-Q?
Psy-Q was an SDK created by SN Systems Limited and Psygnosis. The SDK came with manuals, documents, discs, floppies, a blue parallel dongle and a SCSI ISA interface (yellow) card for the comms link to the Playstation 1.
The SDK was later on ripped and dumped onto the Internet, where many enthusiasts created their own games and applications on the PlayStation. It is is the official Sony SDK that game developers used to create their games.
So lets gets started. First off, you will need to download the PSY-Q SDK by clicking here.
If you are confused on what one to download from the list, download the 139MB archive called 'PSY-Q SDK' that is marked in bold text.
As a note, remember that Psy-Q will ONLY run on a Windows 32-bit operating system. Psy-Q does not work under Windows 64-bit versions at all, and even if you do manage to get it working, the tools you will need won't run correctly.
Psy-Q was originally designed for Windows 3.1, with Sony updating it along the way to be more compatible with Windows 95 and 98. Windows 95 is what early developers used at the time to make PlayStation 1 games, but Windows 98 or XP will be an updated equivalent to use over Windows NT and 95.
If you are stuck or confused because you have a 64-bit OS, follow this tutorial on how to setup and use our pre-configured Windows XP disk image for use in Microsoft's Virtual PC. You will not need to setup Psy-Q as it is already pre-configured and ready to go.
Apart fromt that, the next step is to extract Psy-Q to your 'C:\' directory (root). Once extracted, the structure will be 'C:\psyq\...'.
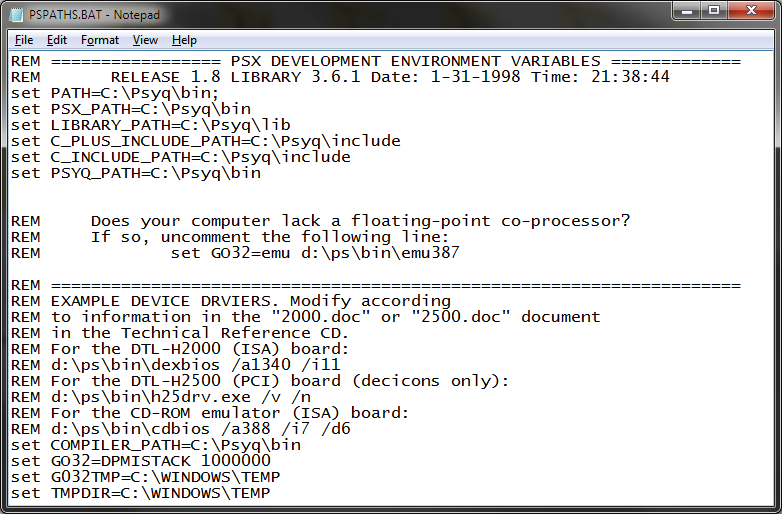
NOTE: If you do not call the directory 'psyq' (it is advised you do not change it from 'psyq'), then you will need to edit PSPATHS.BAT (if you are using Windows 9x) replacing the 'sets' seen in the below image with the correct directory name. If you are using Windows XP and above, you need to edit your environment variables (explained below).
Once extracted, you will see under 'C:\psyq\':
C:\psyq\3rdParty
C:\psyq\addons
C:\psyq\beta
C:\psyq\bin
C:\psyq\cdemu
C:\psyq\cdgen
C:\psyq\DOCS
C:\psyq\include
C:\psyq\kanji
C:\psyq\lib
C:\psyq\opm
C:\psyq\PA
C:\psyq\psx
C:\psyq\psxgraph
C:\psyq\psyq
C:\psyq\zips
C:\psyq\PSPATHS.BAT
C:\psyq\PSXICON.ICO
C:\psyq\README.PDF
C:\psyq\README.TXT
If you have Windows 95, 98, ME, etc, you need to use AUTOEXEC.BAT to CALL PSPATH.BAT on boot
Add this line to the AUTOEXEC.BAT file (found in the 'C:\' directory) 'CALL C:\psyq\PSPATHS.BAT'.
However, if you have Windows XP, Vista, 7, etc, you will need to add the variables to your 'Environment Variables' list, as explained here. It is recommended to run the registry file so the environment variables are added automatically for you.
Congratulations! You now have PSY-Q installed, and you are ready to make PlayStation 1 games.
You can now make a 'Hello World' program by reading here.
 , "PlayStation",
  ,
,  , "DUALSHOCK", "Net Yaroze" and "PSone" are registered trademarks of Sony Computer Entertainment Inc.